Dual Plug & Play Wiring Loom | For LED Work Lights
- Regular price
- $59.95
- Sale price
- $59.95
- Regular price
-
$69.95 - Unit price
- per
Available on orders $70 to $1000
Learn More
Available on orders $70 to $1000
Learn More
The HIMOD Plug & Play Wiring Loom makes installing your Reverse Flush Mount lights effortless. No splicing, no cutting factory wires, no electrical expertise required. Everything plugs together in minutes.
Truly plug and play. It's that simple.
Designed specifically for the HIMOD Reverse Flush Mount with universal compatibility for auxiliary reverse lights.
Everything Included, Nothing to Guess
One complete kit with every component needed. Battery to lights, all sorted. Just plug it together and you're done.
In the box:
- Dual output connectors for two reverse lights
- Illuminated in-cab ON/OFF switch (red LED)
- 20A inline fuse and holder
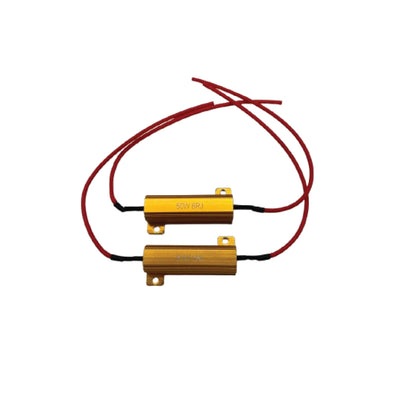
- Pre-wired automotive relay
- Heavy-duty 16-18 AWG wiring
- Colour-coded battery terminals (red/black)
- Complete plug-and-play connections
- Full installation diagram included
No additional parts needed. No trips to the auto shop. Just install and run.
In-Cab Switch: Full Control
Mount the illuminated switch in your cabin for manual control of your reverse lights. Use them as camp lighting, work lights, or for boat ramps without being stuck in reverse gear.
Simple control:
- Switch ON: lights work with reverse gear
- Switch OFF: lights stay off
- Manual override: use lights anytime without reversing
- Red LED shows when switch is active
- Clean, professional look
True Plug & Play Design
Every connection is plug and play. No wire stripping, no crimping, no soldering. Connect the battery terminals, tap one wire to your reverse light, plug in your lights. Done.
What plug and play means:
- Battery terminals clip on (red to positive, black to negative)
- Single wire tap to factory reverse light
- Lights plug directly into dual outputs
- Relay pre-wired and ready to mount
- Fuse holder integrated in line
- Switch with plug connectors
If you can follow a diagram, you can install this. That's the whole point.
Wire Lengths & Measurements
Key measurements:
- Battery to relay: 1000 mm
- Relay to in-cab switch: 3000 mm
- Relay to dual outputs: 5000 mm

Installation Diagram
Step 1: Battery Connection
Clip colour-coded terminals to the battery. Red to positive (+), black to negative (-). Remove fuse during install.
Step 2: Mount Relay
Secure relay in engine bay using mounting tab. Keep away from heat sources.
Step 3: In-Cab Switch
Route switch wire through firewall. Mount switch in dash or console within driver's reach.
Step 4: Plug In Lights
Plug your HIMOD Reverse Flush Mount lights ( or third-party lights ) into the dual output connectors. Left and right. Done.
Complete installation diagram included with every kit showing exact wire routing and connections.
Perfect for HIMOD Reverse Flush Mount
This wiring loom plugs directly into the HIMOD Reverse Flush Mount (sold separately). Buy two Reverse Flush Mount units (one for each side) and this wiring loom powers both from a single installation.
Complete reverse lighting system:
- Left Reverse Flush Mount plugs into output 1
- Right Reverse Flush Mount plugs into output 2
- Both controlled by one in-cab switch
No guessing compatibility. These are designed to work together.
Technical Specifications
| Specification | Details |
|---|---|
| Voltage | DC 9 - 16 V |
| Fuse | 20A inline fuse and holder |
| Watts Rating | 60W *2 |
| Switch | Illuminated red LED rocker |
| Wiring Plug | 2 Pin Deutsch Plug |
| Battery Terminals | Clip-on red/black coded |
| Input | 16 AWG Wiring |
| Output | 18 AWG Wiring |
What's Included
- 1 x Complete plug & play wiring loom
- 1 x Illuminated in-cab switch (red LED)
- 1 x 20A inline fuse and holder
- 1 x Pre-wired automotive relay
- 2 x Dual output connectors
- 1 x Battery terminal set (red/black)
- 1 x Installation diagram
Note: HIMOD Reverse Flush Mount lights sold separately. Purchase 2 units for a complete pair (left and right).
Why Plug & Play Matters
Most reverse light installs require cutting factory wires, crimping connections in tight spaces, and figuring out relay diagrams. Not this one.
We built this loom so anyone can install professional auxiliary reverse lights without electrical knowledge. Everything plugs together. Follow the diagram. Test it. Done.
No cutting factory wires
No crimping or soldering
No confusing relay diagrams
Just plug and play
If it doesn't plug together easily, you're doing it wrong. That's how simple we made this.
Warranty & Support
All HIMOD products come with a 24-month (2-year) warranty from date of delivery.
The HIMOD Plug & Play Wiring Loom makes installing your Reverse Flush Mount lights effortless. No splicing, no cutting factory wires, no electrical expertise required. Everything plugs together in minutes.
Truly plug and play. It's that simple.
Designed specifically for the HIMOD Reverse Flush Mount with universal compatibility for auxiliary reverse lights.
Everything Included, Nothing to Guess
One complete kit with every component needed. Battery to lights, all sorted. Just plug it together and you're done.
In the box:
- Dual output connectors for two reverse lights
- Illuminated in-cab ON/OFF switch (red LED)
- 20A inline fuse and holder
- Pre-wired automotive relay
- Heavy-duty 16-18 AWG wiring
- Colour-coded battery terminals (red/black)
- Complete plug-and-play connections
- Full installation diagram included
No additional parts needed. No trips to the auto shop. Just install and run.
In-Cab Switch: Full Control
Mount the illuminated switch in your cabin for manual control of your reverse lights. Use them as camp lighting, work lights, or for boat ramps without being stuck in reverse gear.
Simple control:
- Switch ON: lights work with reverse gear
- Switch OFF: lights stay off
- Manual override: use lights anytime without reversing
- Red LED shows when switch is active
- Clean, professional look
True Plug & Play Design
Every connection is plug and play. No wire stripping, no crimping, no soldering. Connect the battery terminals, tap one wire to your reverse light, plug in your lights. Done.
What plug and play means:
- Battery terminals clip on (red to positive, black to negative)
- Single wire tap to factory reverse light
- Lights plug directly into dual outputs
- Relay pre-wired and ready to mount
- Fuse holder integrated in line
- Switch with plug connectors
If you can follow a diagram, you can install this. That's the whole point.
Wire Lengths & Measurements
Key measurements:
- Battery to relay: 1000 mm
- Relay to in-cab switch: 3000 mm
- Relay to dual outputs: 5000 mm
Installation Diagram
Step 1: Battery Connection
Clip colour-coded terminals to the battery. Red to positive (+), black to negative (-). Remove fuse during install.
Step 2: Mount Relay
Secure relay in engine bay using mounting tab. Keep away from heat sources.
Step 3: In-Cab Switch
Route switch wire through firewall. Mount switch in dash or console within driver's reach.
Step 4: Plug In Lights
Plug your HIMOD Reverse Flush Mount lights ( or third-party lights ) into the dual output connectors. Left and right. Done.
Complete installation diagram included with every kit showing exact wire routing and connections.
Perfect for HIMOD Reverse Flush Mount
This wiring loom plugs directly into the HIMOD Reverse Flush Mount (sold separately). Buy two Reverse Flush Mount units (one for each side) and this wiring loom powers both from a single installation.
Complete reverse lighting system:
- Left Reverse Flush Mount plugs into output 1
- Right Reverse Flush Mount plugs into output 2
- Both controlled by one in-cab switch
No guessing compatibility. These are designed to work together.
Technical Specifications
| Specification | Details |
|---|---|
| Voltage | DC 9 - 16 V |
| Fuse | 20A inline fuse and holder |
| Watts Rating | 60W *2 |
| Switch | Illuminated red LED rocker |
| Wiring Plug | 2 Pin Deutsch Plug |
| Battery Terminals | Clip-on red/black coded |
| Input | 16 AWG Wiring |
| Output | 18 AWG Wiring |
What's Included
- 1 x Complete plug & play wiring loom
- 1 x Illuminated in-cab switch (red LED)
- 1 x 20A inline fuse and holder
- 1 x Pre-wired automotive relay
- 2 x Dual output connectors
- 1 x Battery terminal set (red/black)
- 1 x Installation diagram
Note: HIMOD Reverse Flush Mount lights sold separately. Purchase 2 units for a complete pair (left and right).
Why Plug & Play Matters
Most reverse light installs require cutting factory wires, crimping connections in tight spaces, and figuring out relay diagrams. Not this one.
We built this loom so anyone can install professional auxiliary reverse lights without electrical knowledge. Everything plugs together. Follow the diagram. Test it. Done.
No cutting factory wires
No crimping or soldering
No confusing relay diagrams
Just plug and play
If it doesn't plug together easily, you're doing it wrong. That's how simple we made this.
Warranty & Support
All HIMOD products come with a 24-month (2-year) warranty from date of delivery.
It’s vital that your order reaches you quickly and safely. When you order, our reliable logistics partners ensure that your order is transported to you with utmost care. And to ensure that your order arrives in top condition. On this page, you will find extensive information on shipping and delivery.
Handling Time:
Please allow 24 - 48 hours for your items to be prepared/processed before shipment* For suspension order's please allow 7-14 business days for construction/preparation of your order.
Please note we reserve the right to not send out orders until your payment has been received in our account which generally can take 24 - 48 hours.
*Please note, this does not apply to any product that is on back order as stated in product summaries.
Shipping Within Australia, New Zealand & USA Only:
- Please note: No pickup/collection available ( Coming Soon )
- Orders are dispatched from P.O BOX 334, Coolum Beach 4573, QLD, Australia
Shipping Times ( Australia 🇦🇺 ):
- Australia Post Standard 5 - 9 Days
- Express Australia Post 1 - 3 Days
- Star Track Express 1 - 3 Days
Shipping Times ( New Zealand 🇳🇿 ):
- Australia Post International Standard 8 - 13 Days
- Australia Post International Express 5 - 10 Days
- DHL International Express 4 - 8 Days
Shipping Times ( USA 🇺🇸 ):
- Australia Post International Standard 10 - 15 Days
- Australia Post International Express 7 - 10 Days
- DHL International Express 4 - 8 Days
International Tax Or Fees:
Please note HIMOD isn't liable for international taxes or fees that are charged for importations of goods into any country.
Last Updated: 04/09/2025
At HIMOD, we stand behind the quality of our products. Please read this policy carefully to understand your warranty rights and responsibilities.
1. Warranty Period
-
All HIMOD products come with a 24-month (2-year) warranty from the date of delivery.
-
Warranty does not extend when replacement parts or units are supplied.
2. Who Can Claim
-
Warranty applies only to the original purchaser.
-
Non-transferable: If the product is sold, gifted, or transferred, the warranty does not carry over.
3. Major and Minor Faults
-
Major Faults: Replacement, repair, or refund at the choice of the buyer.
-
Minor Faults: Replacement or repair at the discretion of HIMOD.
-
Important: HIMOD must receive the failed product for inspection before issuing any replacement, repair, or refund.
4. When Warranty is Void
The warranty does not cover:
-
Tampering, disassembly, or modification
-
Incorrect installation or misuse
-
Damage exceeding normal wear and tear
-
Damage caused by collisions, electrical faults, or external factors
Note: HIMOD is not responsible for installation, removal, packaging, or shipping costs associated with warranty claims.
5. ADR / Legal Use Disclaimer
-
Some HIMOD products, including tail lights and LED bars, may not comply with Australian Design Rules (ADR) for on-road use.
-
Customers must ensure products are legal for road use in their state or territory.
-
Products may be off-road use only. Using non-compliant products on public roads may void insurance or breach traffic laws.
-
By purchasing, you accept all legal risks associated with non-compliant products.
6. Your Rights Under Australian Consumer Law (ACCC)
-
This warranty does not limit your rights under Australian Consumer Law.
-
You may still be entitled to a repair, replacement, or refund if the product is faulty, damaged, or not fit for purpose.
7. How to Make a Warranty Claim
-
Contact us at support@himod4x4.com or by mail:
PO BOX 334, Coolum Beach, QLD, Australia
-
Proof of purchase
-
Description of the fault or issue
-
Photos or videos if applicable
-
-
We will provide instructions for returning the product if required.
8. Processing
-
HIMOD will inspect returned items to verify the fault.
-
Once approved, a replacement, repair, or store credit/refund will be issued.
-
HIMOD is not responsible for costs associated with return shipping unless explicitly agreed for defective items under warranty.