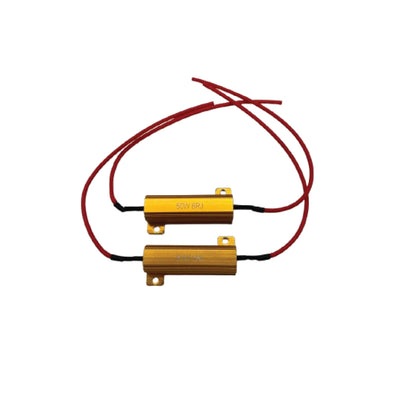
Load Resistors (Pair) - 12 Volt 50W
- Regular price
- $31.95
- Sale price
- $31.95
- Regular price
-
- Unit price
- per
Available on orders $70 to $1000
Learn More
Available on orders $70 to $1000
Learn More%20-%2012%20Volt%2050W)
Optimise Your Vehicle’s Lighting System with Precision
Our 12 Volt 50W / 75W / 100 W Load Resistors are essential for preventing hyper-flashing or bulb-out warnings in vehicles equipped with LED lights. These resistors simulate the power load of traditional halogen bulbs, ensuring your LEDs function smoothly without triggering false signals in your vehicle's electrical system. With durable construction and easy installation, these load resistors are designed to handle high heat and deliver consistent performance.
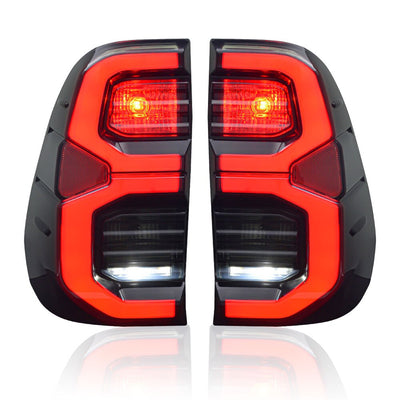
Compatible With Our Tray Light Range.
Options:
50 W - 6 ohms
75 W - 8 ohms
100 W - 6 ohms
Features:
- 50W Power Rating: Ideal for most automotive applications, delivering precise load simulation.
- Prevents Hyper-Flashing: Corrects the fast-blinking issue caused by low-power LED lights.
- Resolves Bulb-Out Warnings: Ensures your vehicle’s onboard computer recognizes LED bulbs correctly.
- Durable Aluminum Housing: Heat-resistant and designed for long-lasting performance.
- Easy Installation: Comes with pre-attached wire leads for quick and secure installation.
- Universal Fit: Compatible with 12V vehicles, including cars, trucks, motorcycles, and more.
How To Install:
1: Mount on a Metal Surface:
Secure the load resistor to a metal surface (like the vehicle’s chassis or a dedicated mounting bracket) to help dissipate heat effectively, as it can reach temperatures of up to 170°C during operation. Make sure it's mounted away from any sensitive components or wiring that could be damaged by heat.
2: Wire Between Lamp Inputs:
Identify the Wires: Locate the positive (often marked with red or a '+' symbol) and negative (usually black or a '-' symbol) input wires of the LED lamp you are working with.
Disconnect Power: Before making any connections, disconnect the power supply to avoid accidental short circuits or shocks.
Connect the Resistor: Take one end of the resistor and connect it to the positive wire of the lamp. Connect the other end of the resistor to the negative wire of the lamp, ensuring that the resistor joins the circuit and allows the current to flow continuously. This wiring method allows the resistor to load the circuit properly without affecting the vehicle’s chassis.
3: Final
Secure Connections:
Use Proper Connectors: Utilize heat shrink tubing or electrical connectors to secure the connections and prevent exposure to moisture and corrosion.
Double Check Connections: Ensure that all connections are tight and insulated properly to avoid any loose wiring, which can lead to electrical issues or flickering lights.
Test the System: After installation, reconnect the power supply and test the lights to ensure everything is functioning correctly. Check for any hyper-flashing or error codes, confirming the resistors are properly wired and operational.
Important:
It’s important to mount the resistor on a metal surface, as it can heat up to 170°C during operation.
Connecting to the chassis can cause grounding issues, which may lead to problems with your vehicle’s lighting system. Proper installation ensures reliable performance and avoids electrical faults.
2 Year Warranty (24 months)
Specifications:
- 50 Watt 6Ω Ohms
- 12 Volt
Optimise Your Vehicle’s Lighting System with Precision
Our 12 Volt 50W / 75W / 100 W Load Resistors are essential for preventing hyper-flashing or bulb-out warnings in vehicles equipped with LED lights. These resistors simulate the power load of traditional halogen bulbs, ensuring your LEDs function smoothly without triggering false signals in your vehicle's electrical system. With durable construction and easy installation, these load resistors are designed to handle high heat and deliver consistent performance.
Compatible With Our Tray Light Range.
Options:
50 W - 6 ohms
75 W - 8 ohms
100 W - 6 ohms
Features:
- 50W Power Rating: Ideal for most automotive applications, delivering precise load simulation.
- Prevents Hyper-Flashing: Corrects the fast-blinking issue caused by low-power LED lights.
- Resolves Bulb-Out Warnings: Ensures your vehicle’s onboard computer recognizes LED bulbs correctly.
- Durable Aluminum Housing: Heat-resistant and designed for long-lasting performance.
- Easy Installation: Comes with pre-attached wire leads for quick and secure installation.
- Universal Fit: Compatible with 12V vehicles, including cars, trucks, motorcycles, and more.
How To Install:
1: Mount on a Metal Surface:
Secure the load resistor to a metal surface (like the vehicle’s chassis or a dedicated mounting bracket) to help dissipate heat effectively, as it can reach temperatures of up to 170°C during operation. Make sure it's mounted away from any sensitive components or wiring that could be damaged by heat.
2: Wire Between Lamp Inputs:
Identify the Wires: Locate the positive (often marked with red or a '+' symbol) and negative (usually black or a '-' symbol) input wires of the LED lamp you are working with.
Disconnect Power: Before making any connections, disconnect the power supply to avoid accidental short circuits or shocks.
Connect the Resistor: Take one end of the resistor and connect it to the positive wire of the lamp. Connect the other end of the resistor to the negative wire of the lamp, ensuring that the resistor joins the circuit and allows the current to flow continuously. This wiring method allows the resistor to load the circuit properly without affecting the vehicle’s chassis.
3: Final
Secure Connections:
Use Proper Connectors: Utilize heat shrink tubing or electrical connectors to secure the connections and prevent exposure to moisture and corrosion.
Double Check Connections: Ensure that all connections are tight and insulated properly to avoid any loose wiring, which can lead to electrical issues or flickering lights.
Test the System: After installation, reconnect the power supply and test the lights to ensure everything is functioning correctly. Check for any hyper-flashing or error codes, confirming the resistors are properly wired and operational.
Important:
It’s important to mount the resistor on a metal surface, as it can heat up to 170°C during operation.
Connecting to the chassis can cause grounding issues, which may lead to problems with your vehicle’s lighting system. Proper installation ensures reliable performance and avoids electrical faults.
2 Year Warranty (24 months)
Specifications:
- 50 Watt 6Ω Ohms
- 12 Volt
It’s vital that your order reaches you quickly and safely. When you order, our reliable logistics partners ensure that your order is transported to you with utmost care. And to ensure that your order arrives in top condition. On this page, you will find extensive information on shipping and delivery.
Handling Time:
Please allow 24 - 48 hours for your items to be prepared/processed before shipment* For suspension order's please allow 7-14 business days for construction/preparation of your order.
Please note we reserve the right to not send out orders until your payment has been received in our account which generally can take 24 - 48 hours.
*Please note, this does not apply to any product that is on back order as stated in product summaries.
Shipping Within Australia, New Zealand & USA Only:
- Please note: No pickup/collection available ( Coming Soon )
- Orders are dispatched from P.O BOX 334, Coolum Beach 4573, QLD, Australia
Shipping Times ( Australia 🇦🇺 ):
- Australia Post Standard 5 - 9 Days
- Express Australia Post 1 - 3 Days
- Star Track Express 1 - 3 Days
Shipping Times ( New Zealand 🇳🇿 ):
- Australia Post International Standard 8 - 13 Days
- Australia Post International Express 5 - 10 Days
- DHL International Express 4 - 8 Days
Shipping Times ( USA 🇺🇸 ):
- Australia Post International Standard 10 - 15 Days
- Australia Post International Express 7 - 10 Days
- DHL International Express 4 - 8 Days
International Tax Or Fees:
Please note HIMOD isn't liable for international taxes or fees that are charged for importations of goods into any country.
Last Updated: 04/09/2025
At HIMOD, we stand behind the quality of our products. Please read this policy carefully to understand your warranty rights and responsibilities.
1. Warranty Period
-
All HIMOD products come with a 24-month (2-year) warranty from the date of delivery.
-
Warranty does not extend when replacement parts or units are supplied.
2. Who Can Claim
-
Warranty applies only to the original purchaser.
-
Non-transferable: If the product is sold, gifted, or transferred, the warranty does not carry over.
3. Major and Minor Faults
-
Major Faults: Replacement, repair, or refund at the choice of the buyer.
-
Minor Faults: Replacement or repair at the discretion of HIMOD.
-
Important: HIMOD must receive the failed product for inspection before issuing any replacement, repair, or refund.
4. When Warranty is Void
The warranty does not cover:
-
Tampering, disassembly, or modification
-
Incorrect installation or misuse
-
Damage exceeding normal wear and tear
-
Damage caused by collisions, electrical faults, or external factors
Note: HIMOD is not responsible for installation, removal, packaging, or shipping costs associated with warranty claims.
5. ADR / Legal Use Disclaimer
-
Some HIMOD products, including tail lights and LED bars, may not comply with Australian Design Rules (ADR) for on-road use.
-
Customers must ensure products are legal for road use in their state or territory.
-
Products may be off-road use only. Using non-compliant products on public roads may void insurance or breach traffic laws.
-
By purchasing, you accept all legal risks associated with non-compliant products.
6. Your Rights Under Australian Consumer Law (ACCC)
-
This warranty does not limit your rights under Australian Consumer Law.
-
You may still be entitled to a repair, replacement, or refund if the product is faulty, damaged, or not fit for purpose.
7. How to Make a Warranty Claim
-
Contact us at support@himod4x4.com or by mail:
PO BOX 334, Coolum Beach, QLD, Australia
-
Proof of purchase
-
Description of the fault or issue
-
Photos or videos if applicable
-
-
We will provide instructions for returning the product if required.
8. Processing
-
HIMOD will inspect returned items to verify the fault.
-
Once approved, a replacement, repair, or store credit/refund will be issued.
-
HIMOD is not responsible for costs associated with return shipping unless explicitly agreed for defective items under warranty.